What is the WSL, and why should You use it?
The WSL (short for Windows Subsystem for Linux) is a Windows feature that allows You to run a Linux environment (like Ubuntu, Debian, Arch, etc.) without having to manage virtual machines or set up dual-boot. After installing it, You will be able to open a Linux terminal from Your Windows system just like You would open PowerShell. This way, You can benefit from all the tools and features You won’t be able to get on Windows (or that are unnecessarily hard to set up).
Prerequisites
First of all, You have to set up WSL. If You are on Windows 10 (version 2004 and higher) or Windows 11, it is as easy as running wsl --install.
That will install Ubuntu as Your distro by default. You can list all available in the online store using wsl --list --online. Install them by running wsl --install -d <distro-name>. Or import any Linux distro as a tar file to use with WSL.
Also, You should already have everything, like Your ssh keys and AWS profiles, configured on Windows. I will explain how to integrate those with the WSL, but not how to set those up initially.
Install Nala (optional)
If You are new to Linux You may want to install Nala.
It’s a front-end for libapt-pkg. It makes installing and updating software easier for new users. Install it using sudo apt install nala. Now You can run sudo nala … instead of sudo apt …. Try it out by running sudo nala update and sudo nala upgrade!
Open .bash_aliases by running sudo nano .bash_aliases and add the following lines:
alias sudo="sudo "
alias apt="nala"
Run source ~/.bashrc or restart the terminal to activate those aliases. Now every apt-command will be replaced with nala automatically.
Install Zsh and Oh-My-Zsh
Zsh is a Unix shell like Bash, but it offers way more possibilities when it comes to customizing. Install it using sudo apt install zsh.
The next step is to install Oh-My-Zsh, a framework for Zsh that will make customizing it even easier. Install it by running sh -c “$curl -fsSL https://raw.githubusercontent.com/ohmyzsh/ohmyzsh/master/tools/install.sh)”.
Last but not least install the powerlevel10k theme, a great theme that comes with out-of-the-box support for many tools like git, AWS CLI, asdf-vm, and more. To do this, download and install the required fonts to Your Windows system. Then open Your WSL configuration (right-click on the title bar) and set the font to MesloLGS NF. Then download to Your WSL system by running git clone --depth=1 https://github.com/romkatv/powerlevel10k.git ${ZSH_CUSTOM:-$HOME/.oh-my-zsh/custom}/themes/powerlevel10k. Open .zshrc (sudo nano .zshrc) and set the theme:
ZSH_THEME="powerlevel10k/powerlevel10k"
Restart Zsh by running exec zsh. Now a configuration wizard starts, which helps You to set up Your terminal according to Your preferences. You can always restart this wizard with the command p10k configure. Most segments get enabled by default but have a look at the documentation to get information on how to enable or disable segments.
Some of the segments Zsh will show You by default:
-
Your currently selected AWS profile and region (this also works for Azure and other services)
-
Your current Git branch and the amount of changes to pull and push
-
asdf-vm tool versions in the current directory
One more thing before Zsh is ready to go: You have to set up the aliases in the Zsh-config. Add them directly to .zshrc or link the .bash_aliases file by adding the following line to .zshrc (make sure to reload Zsh afterward — exec zsh):
source $HOME/.aliases
If You haven’t already made Zsh Your default shell run chsh -s $(which zsh).

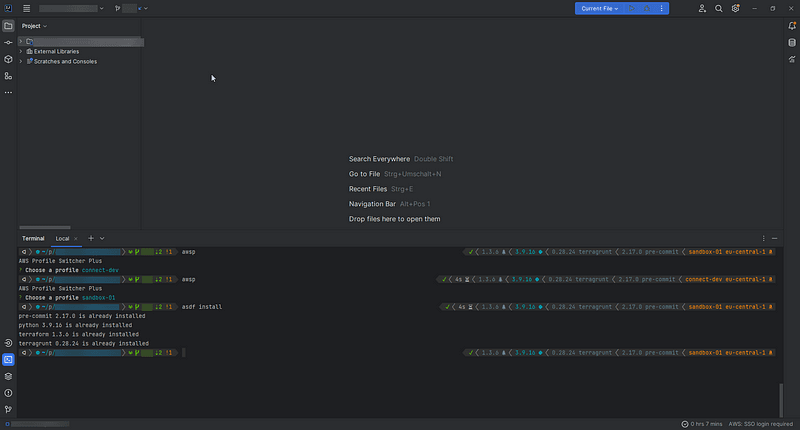
Install AWS CLI and awsp
First of all, install unzip (sudo apt install unzip), then follow the instructions in the getting-started guide.
If You already have aws profiles configured on Your Windows system, You can synch those by using ln -s /mnt/c/Users/<your windows user name>/.aws/ ~/. This also synchronizes all current sessions, so there is no need to log in twice when accessing a profile from both Windows and the WSL.
I recommend that You install a tool like awsp-plus to switch between profiles quickly. It works fine with SSO profiles, but if You use credentials, You should check out aws-vault. After You have installed Node.js and npm (sudo apt install nodejs npm) You can install it using npm install -g awspp. Set up an alias for it and its ready to go:
alias awsp="source _awspp"
Set up ssh
If You are using ssh-keys for connecting to Your Git repositories, You probably want to synch them like the AWS profiles. However, this will mess up the permissions, which are essential for ssh. You can fix this by creating (or updating) wsl.conf (sudo nano /etc/wsl.conf) and adding those two lines:
[automount]
enabled = true
options = "metadata,umask=0077,fmask=0077"
Now close all active WSL sessions (use wsl --shutdown in PowerShell) and open one again. Now You can link Your .ssh directory using ln -s /mnt/c/Users/<your windows user name>/.ssh ~/.
Update the permissions of Your ssh keys and ssh should work like You are used to: chmod 700 ~/.ssh/ and chmod 600 ~/.ssh/*.
Set up asdf-vm
asdf-vm is a CLI tool for managing multiple runtime versions. It enables You to quickly switch between different projects using different versions of Your tools. All it takes is a .tool-versions file in the project’s directory containing the version definitions.
Install asdf-vm following their get-started guide. There are different instructions depending on Your system. You probably want to go with Zsh & Git (or with Bash & Git, if You aren’t using Zsh).
Once installed You can add plugins. You can refer to this list of all the available plugins. Add the Terraform plugin and install it: asdf plugin add terraform and asdf install terraform latest. Now configure asdf-vm so that it will globally use the latest version if there is no other version specified: asdf global terraform latest. Try it out: terraform --version.
Configure IntelliJ IDE (optional)
Last but not least configure the IDE of Your choice. I’m using IntelliJ (and the other JetBrains IDEs). JetBrains provides some information on how to use their IDE with the WSL. To use the WSL shell instead of Your default Windows shell, open Settings > Tools > Terminal > Shell path and set it to wsl.exe.
You may also want to install a few plugins:
-
Use the AWS Toolkit for Jetbrains to view and manage Your AWS resources or test and debug Your Lambda functions locally.
-
The Terraform and HCL plugin adds syntax highlighting, code completion, and other features for .hcl files.
-
The Nyan Progress Bar has no practical use and is totally optional, but You’ll really miss out on something if You don’t install it!
Open Your first project
Create a directory for Your projects in Your home folder (mkdir projects) and navigate into it (cd projects). Use git and ssh to clone Your repo (git clone git@<repo url>) and navigate into it (cd <repo directory>).
Open IntelliJ on Windows. Open a project and select to open it from WSL now select Your project directory ( /wsl$/Ubuntu/home/<wsl user name>/projects/<repo directory>) and open it.
Define all the necessary tool versions in a .tool-versions file in Your project’s root folder and run asdf install.
Now You are ready to go.
TL;DR
You can find all the essential information and commands in my GitHub repo. If I find new ways to improve my setup, You’ll find out on GitHub first. I will also try to keep it up to date with any changes to the tools I’m using.
https://github.com/lkrimphove/knowledge/blob/main/aws/guide-wsl-cloud-dev-environment.md